Saturday, October 31, 2009

CAPTURE YOUR DESKTOP BY USING PRINT SCREEN OPTION

CAPTURE YOUR DESKTOP SCREEN AS A PICTURE
Uses of print scree option:
     This option has defaultly in win xp... here I captured my destop screen...


Steps for screen shot:
1. In your keyboard notice that a key is mentioned as 'PRINT SCREEN' This key have almost in all keyboard..Then do this...
2. Select a scene on your desktop...Then Press "PRINT SCREEN" key...
3. After pressing PRINT SCREE key...Go to paint program or any image editing softwares..
4. In Paint press Ctrl+v... After u seen the image we previously given print screen...
5. Now goto File(tab) Save as(tab);give file name and saving location.... while saving the screen shot defaultly save file as  "265 bitmap color(gif,)" format...If U save that image by default option the file could be bigger in size around 2 MB..
6.You have to change the image file to jpeg. format...Thats all ur captured image will be in .jpg format...


ANOTHER STEP SCREEN CAPTURE FOR PERTICULAR POPUP WINDOW
To capture a screen shot of only a window, a popup, or an error dialog:
  1. Make sure the window or popup which you want to capture is active (on the very front of your screen).
  2. Hold the "Alt" button and press "Print Screen" key on your keyboard (or "Print Scrn", or similar).
  3. Open an image editor and press Ctrl-V to paste the image and save the file as Jpeg, Bitmap, etc..

Wednesday, October 28, 2009

A GREAT SITE FOR DOWNLOADING ANY SOFTWARE OR OS

A VERY GOOD SITE TO DOWNLOAD ANY SOFTWARE OR OS WITH FULL VERSIONS 
            
              www.dl4all.com

Tuesday, October 27, 2009

TRICK TO DOWNLOAD MP3 SONGS FROM GOOGLE SEARCH ENGINE

GREAT TRICK FOR MP3 SONGS DOWNLOADING ON GOOGLE 
Go to google copy and paste in

?intitle:index.of? mp3
and after mp3 put in an artist or album or whatever and hit enter… what you get is lists of downloadable mp3s

eg:
?intitle:index.of? mp3 shakira

enjoy downloading…………

USE GOOGLE SEARCH INGINE TO GET SERIAL NO. OF ANY SOFTWARE

Most of the people downloading trial and using it, only after the expiration of trial they try for crack, Serial No, Keygen, Patch....
USE GOOGLE TO GET SERIAL NO OF ANY SOFTWARE
But many don't known where to get Serial No, Some websites may be infect your system with Trojan horse, Viruses, Ad ware, Spy ware....

So for beginners this is a simply way to find hack with less effort and it saves time to, But make sure you have anti virus activated before trying to get some Serials, Patches to avoid data loss

Just follow the steps as instructed below

1) Go to google
2) type this syntax in search bar " 94FBR"
3) Replace Product name with desired software and leave a space then type 94FBR
4) Press enter, thats it

Now you receive Many pages which contains Serial no, Crack, Patches....

DOWNLOAD ANY MP3 SONG FROM GOOGLE WEBSITE


DOWNLOAD ANY MP3 FROM GOOGLE WEB SITE

This is a google search trick ..
CODE
intitle:index.of “mp3″ +”in da club” -htm -html -php -asp “Last Modified”
Just enter the name of the song instead of ‘in da club’ in the coded text and search for it in google.
E.g. If you wanted to find a song called… sexy back (justin timberlake)
You put…
CODE
intitle:index.of “mp3″ +”sexy back” -htm -html -php -asp “Last Modified”
Try it yourself, but obviously it won’t work for every song!

ENABLE WINDOWS ZIP TOOL IN WINDOWS XP

ENABLE THE WINDOWS ZIP TOOL

Windows XP comes built in with a compression tool that reads ZIP files as folders. When you install Windows, you can open ZIP files using that tool. Then, say you install WinZip or WinRAR, and then uninstall it. You’ll then need to reenable the inbuilt ZIP file reader. To enable Windows ZIP files as a folder feature again, you can use a simple command. At a command prompt,enter

“regsvr32 %windir%\ system32\zipfldr.dll”.

Press [Enter].

DELETE AN UNDELETABLE FILE IN WINDOWS XP

Delete An 'UN DELETABLE" File In  WINDOWS XP


Delete An "undeletable" File

Open a Command Prompt window and leave it open.
Close all open programs.
Click Start, Run and enter TASKMGR.EXE
Go to the Processes tab and End Process on Explorer.exe.
Leave Task Manager open.
Go back to the Command Prompt window and change to the directory the AVI (or other undeletable file) is located in.
At the command prompt type DEL where is the file you wish to delete.
Go back to Task Manager, click File, New Task and enter EXPLORER.EXE to restart the GUI shell.
Close Task Manager.


Or you can try this


Open Notepad.exe

Click File>Save As..>

locate the folder where ur undeletable file is

Choose 'All files' from the file type box

click once on the file u wanna delete so its name appears in the 'filename' box

put a " at the start and end of the filename
(the filename should have the extension of the undeletable file so it will overwrite it)

click save,

It should ask u to overwrite the existing file, choose yes and u can delete it as normal


Here's a manual way of doing it. I'll take this off once you put into your first post zain.

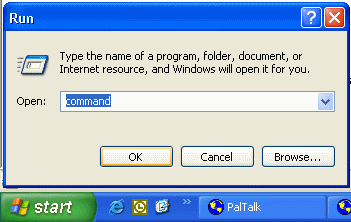
1. Start
2. Run
3. Type: command
4. To move into a directory type: cd c:\*** (The stars stand for your folder)
5. If you cannot access the folder because it has spaces for example Program Files or Kazaa Lite folder you have to do the following. instead of typing in the full folder name only take the first 6 letters then put a ~ and then 1 without spaces. Example: cd c:\progra~1\kazaal~1
6. Once your in the folder the non-deletable file it in type in dir - a list will come up with everything inside.
7. Now to delete the file type in del ***.bmp, txt, jpg, avi, etc... And if the file name has spaces you would use the special 1st 6 letters followed by a ~ and a 1 rule. Example: if your file name was bad file.bmp you would type once in the specific folder thorugh command, del badfil~1.bmp and your file should be gone. Make sure to type in the correct extension

ENABLE PEN DRIVE THAT DISABLED FROM WINDOWS XP


ENABLE USB PORT FOR PEN DRIVE THAT DISABLED ON WINDOWS XP

If your computer admin has disabled your computer for using USB port, you can easily enable USB port of computer for using your pen drive.
There are two method for it
1. If you know admin password, login with it and just go at My computer > right click > Hardware> Device Manager> click on plus sign of Universal serials bus controllers > right click on each USB drive and enable all one by one..
2. If your PC admin disabled USB port through BIOS setting and you don’t know admin password, just do some risky work.
Off your computer, remove the power cable. After that open the chassis of yourcomputer, remove the battery from the motherboard for 2-3 minute. put the battery again into motherboard, start your PC, All Bios setting will get resettled and you an use USB port till your PC admin know that Your PC BIOS is in resetted condition. For more information about BIOS resetting read here.


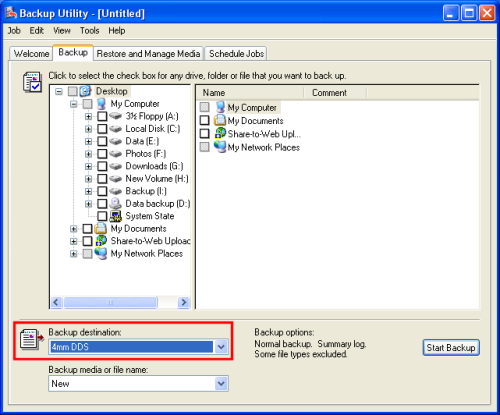
HOW WE BACK UP WINDOWS XP

PROCESS HOW TO BACK UP WINDOWS XP

Learn how to backup your Windows XP computer quickly. This is a down and dirty full system backup. This will allow you to restore everything on your system if you had a system crash.
Steps

1. Click Start -> Run -> type in, with out the quotes, "ntbackup.exe" .
2. Click on Backup Wizard and then "Next".

3. Select the radio button "Backup everything on this computer" and click "Next".
4. Choose a location where you will save your backup.
5. Type in a name of your backup that you will recognize and click "Next".
6. Click "Finish" and your backup will begin.
7. It will complete and provide you a report of the backup.
8. Click "Close" and your backup is complete.


Tips

* Make sure the location you are backing up to has enough storage space to backup your entire computer.
* You will have to be certain you won't have to turn off your computer during the backup.
* Full System backups can take extended amounts of time depending on how much data

Friday, October 23, 2009

SECRET PLEASENT MUSIC IN WINDOWS XP


Windows XP secret music


Microsoft Windows XP is playing a cool music during installation. It is a pleasant little tune that you’ve probably never heard, unless you were present when Windows was being installed on your PC. After that it’s never played again, unless you know where to look for it.To hear what you’ve been missing, just follow these:Make you way to C:\WINDOWS\system32\oobe\images and look for a file called "Title.wma" or possibly "Windows welcome music.wma".It is around 2.56Mb in size. Just double click the file and this will open Windows Media Player, or your defaul player and it will proceed to serenade you with a more than 5 minutes music. It's up to you to repeat it.CooL!!!

Thursday, October 22, 2009

A BLOG FOR ALL SOFTWARES, GAMES, ANTI VIRUS, DOWNLOADS

A BLOG FOR ALL SOFTWARES, GAMES, ANTI VIRUS DOWNLOADS WITH FULL VERSIONS


http://www.hexadownloads.blogspot.com/

Tuesday, October 20, 2009

A SITE FOR ALL MOBILE TIPS AND TRICKS

SITE FOR MOBILE TIPS AND TRICKS


www.mobiletipstricks.com

SOME SECRET TRICKS FOR SYMBIAN BASED NOKIA PHONES


Some secret tips & tricks & codes for symbian based NOKIA mobile phones


To know the IMEI (International Mobile Equipment Identity) No.: *#06#
To check the phones Software revision. *#0000#
To enter the service menu type. *#92702689#
Clock Stopping. *#746025625#
  

#06#Display the IMEI (GSM standard)
*#0000#Display the firmware version and date
*#bta0#Display the Bluetooth MAC address (models with build-in Bluetooth radio, activate first to show address)
*#mac0wlan#Display the WLAN MAC address (models with build-in Wi-fi radio)
*#opr0logo#Clear the operator logo (3310 and 3330 only)
*#pca0#Activate the GPRS PCCCH support (early GPRS models)
*#pcd0#Deactivate the GPRS PCCCH support (early GPRS models)
*#res0wallet#Reset the mobile wallet (models with mobile wallet)
*#res0#Soft-format the memory (Symbian models only)
*#rst0#Reset to factory defaults, confirmation required (DCT4 or newer)
*#sim0clock#Display the SIM clock status (DCT3 only)
*#ssn0#Display the manufacturing serial number (mid-range and premium, non-Symbian models, and those devired from them)
*#war0anty#Display the manufacturing and repair info (no exit on DCT3)
*efr0#Enable EFR encoding (pre-2003 models)
#efr0#Disable EFR encoding (pre-2003 models)
*hra0#Enable HR encoding (pre-2003 models)
#hra0#Disable HR encoding (pre-2003 models)
#pw+1234567890+n#Display the SIM lock status: (pre-2003 models)
n = 1: provider lock
n = 2: network lock
n = 3: country lock
n = 4: SIM lock


Monday, October 19, 2009

FREE MISSED CALL ALERT FOR AIRTEL USERS


MISSED CALL ALERT TRICK FOR AIRTEL USERS
What is “Miss Call Alerts” ??

*
When your phone is Switch Off or Out of Reach :

You will be notified via SMS when you will switch on your phone or you get back your network. To avail follow the instructions given below-

* To activate dial : *62*675# and press call button.
* To deactivate dial : #62# and press call button.

This service will notify the number of missed calls and also display the name of caller if the number was stored in the address book.
It will also notify the subscribers through SMS about all the calls made to them when their mobile phone was switched off or out of the coverage area. This service will work when the customer was not available to take calls. As soon as the mobile phone was available to take calls the customer will receive SMS from Airtel, which will contain details of the last ten missed calls.

UPDATES >>

FREE MISS CALL ALERT FOR MUMBAI
Just dial **62*+91560# and get free miss call alert 4 lifetime..,

FREE MISS CALL ALERT FOR MAHARASHTRA
Just dial **62*+91675# and get free miss call alert 4 lifetime..,

FREE MISS CALL ALERT FOR TAMILNADDU
Just dial **62*+919894035100# and get free miss call alert 4 lifetime..,

FREE MISS CALL ALERT FOR RAJSTHAN
Just dial **62*+91569# and get free miss call alert 4 lifetime..,

FREE MISS CALL ALERT FOR DELHI
Just dial **62*+91564# and get free miss call alert 4 lifetime..,

FREE MISS CALL ALERT 4 GUJRAT
Just dial **62*+919824001711# and get free miss call alert 4 lifetime..,

NOTE :-if u r not able to uses this diverting code than remove +91 or +

BACK UP UR PHONE BOOK USING BLUETOOTH


BACK UP UR MOBILE PHONE CONTACTS BY USING BLUETOOTH

Bluetooth can come really handy when you want to back up mobile data. Whether you have some really important celebrity contacts on your cellphone, or just want to gadget-play, here's how it goes:
  • Make sure you have the Bluetooth hardware and its drivers installed properly on your mobile phone. Recommended: check for new drivers updates!
  • Switch onthe Bluetooth feature on your mobile phone and make sure that it can be seen by other devices.
  • On your Windows system, go to control panel, then choose Bluetooth devices.
  • Click on Add device and after it finishes the search, select your mobile phone.
  • When asked for a passcode, select any one of the options in the list. You can also choose to proceed without a password.
  • If you have selected to use a passcode, enter the same code on your mobile when asked.
  • Once this is finished, you have successfully paired your computer and phone.
  • Runthe mobile phone software you installed earlier. Depending on the software, you will automatically see options to either back up or sync your phone.
  • Choose the back up option... and wait a bit. Tip: Don't click on anything else while the back up is being processed. It might get it to run slower, or even stuck.

SOME RUN COMANDS TO FREE UP SYSTEM MEMORY

SOME RUN COMANDS TO FREE UP SYSYTEM STORAGE IN HARD DISK
           On the system we work on them. On the time of work we use system programs, files,pictures,videos....etc. using those files the virtual data of that files could be saved on the Operating System drive... we can see by clicking START>MY RECENT DOCUMENTS..on recent documents we can access some file only...


    By using the following commends we can access all data... We can also delete that data...


go to START>RUN- 1) recent


                                   2)%temp%


                                   3) temp


                                   4)prefetch


     By using above 4 commands we can access the unwanted data... Then delete that data to free up your system memory......

GMAIL VIRTUAL DRIVE FOR FREE

GET 'GMAIL DRIVE'    FOR FREE


GMail Drive is a free third-party Windows Shell namespace extension ("add-on") for Google's Gmail. It allows a user to access a virtual drive stored in a Gmail e-mail account by causing the contents of the Gmail account to appear as a new network share on the user's workstation. In order to use this add-on, the user needs a Gmail e-mail account. The add-on enables the user to use the standard Windows desktop file copy and paste commands to transfer files to and from the Gmail account as if it were a drive on the user's computer.

In order for GMail Drive to operate, the computer must be connected to the Internet and the user must have a Gmail account. A broadband connection is preferable though not necessary, as all operations are done through Gmail and consequently over the Internet. GMail Drive uses the inbox of the Gmail account to store files and creates a virtual filesystem on top of the Gmail account, enabling the user to save and retrieve files stored on the Gmail account directly from inside Windows Explorer. GMail Drive adds a new virtual drive to the computer under the My Computer folder, where the user can create new folders, copy and drag-and-drop files to, but does not give an actual drive letter, such as C:, preventing its use in all DOS applications, and some older Windows applications.

Download GMail Drive from Softpedia

TRACE E-MAIL SENDER

TRACE ORIGINAL EMAIL SENDER


The purpose of this guide is to show the process involved in tracing an email. The first step required to tracing an email is finding out the headers of the email. What are headers? Email headers are lines added at the top of an email message that are used by servers as the email goes on route to get delivered. Generally email clients only show the standard To, From, and Subject headers, but there are more.

Enabling Email Headers For Gmail

Step 1:Once Logged into your Gmail Account open the Email whose headers you want to view. Click on the “More Options” link in the message next to the date of the email.

Step 2: Now click the “Show Original” link.

Step 3: This link will popup a new window the headers and the body of the message.

Enabling Email Headers For Hotmail

Step 1:Once logged in, click on the "Options" link in the upper navigation bar.

Step 2: Now click on the "Mail Display Settings" link.

Step 3: Change the "Message Headers" option to "Full" and click ok.

Step 4: Go to your inbox and open any one of your email. You emails show now contain additional headers.

Enabling Email Headers For Yahoo

Step 1:Once logged in, click on the "Options" link in the upper navigation bar.

Step 2: Now click on the "General Preferences" link.

Step 3: In the paragraph titled Messages and locate the "Headers" heading and select "All".

Step 4: Go to your inbox and open any one of your email. You emails show now contain additional headers.

Sunday, October 18, 2009

Speed up BSNL Broadband easily

Easily Speed Up ur BSNL Broadband


Tip 1: One of the major problems with BSNL Dataone Broadband connection is the DNS servers they provide by default. Most of the time they are very slow and sometimes they fail to respond. I noticed that I am starting to spend a significant amount of time in DNS resolution with Dataone connection, often it is larger than the time it takes to actually get the reponse. Here is a simple solution to significantly speed up your DNS resolution. Open up the network connection profile and edit TCP/IP settings. In the DNS server address fields, specify the following DNS server addresses: 208.67.222.222 and208.67.220.220

Disconnect the connection and then connect again. You are done. This specifies third party DNS servers which are significantly faster than BSNL Dataone’s DNS servers. Note: The service is provided by OpenDNS.
Tip 2: Firefox users can use FlashBlock extension to prevent downloading of Flash content by default, thereby significantly speeding up browsing experience. You can click on the placeholder icon to display the original Flash content any time. This is more of a passive tip in that reduces data usage to improve your overall experience

Friday, October 16, 2009

Thursday, October 15, 2009

SOME USEFUL WEBSITES FOR DOWNLOADING MP3 SONGS FOR FREE

FREE MP3 SONGS DOWNLOAD WEB SITES

www.atozmp3.org

In this web site you will find latest Telugu&Hindi Mp3 songs in .rar format for free... It can be dowloaded by rar format... By using WINRAR software you can extract that dowloaded file....


http://www.ezeemp3.com/


In this site you wll download latest and old telugu songs... In this u will also can download devotional songs


http://www.à°¤ెà°²ుà°—ుà°¨ౌ.com/


In this site you will find.... Latest telugu film and other news and u will download telugu mp3 songs..


http://musicdownsworld.blogspot.com/


http://www.southmp3.net/


  In this site u find... latest HINDI, TELUGU, TAMIL mp3 songs for free download

TRICK TO SAVE IMAGE FROM ORKUT WEBSITE

TRICK SAVE IMAGE FROM ORKUT THAT WE HAVE BROWSED

 Recent days ORKUT communication website become popular....On browing orkut there is no link to save image from that site.... Do like this which I have mentioned below....


First brower image on orkut..  Put mouse pointer on that image.... just drag the image to another address bar... Now you find that Image on other tab... Now this time you wil find save image link by clicking mouse Right click... Now save image to your computer....

Wednesday, October 14, 2009

GET GMAIL FASTER


Trick to Launch Gmail Faster


                                                                                    You can Notice that the address bar contains the URL of the format http://mail.google.com/mail?auth=DWAR etc.

Now, all you have to do is,

1.change the “http://” in your browser’s address bar to “https://”, which means the URL will now look like https://mail.google.com/mail?auth=DWAR etc.

2.Press Enter.

3.Gmail loads faster

DEFAULT BLURTOOTH SOFTWARE IN WINDOWS XP

Hidden bluetooth software in XP

Now you don't need to install any software for your blutooth device.You don't know but ,there is a hidden bluetooth software in your window xp and vista :-
You can use this software as follows...

1.Open the run command

2.Now type 'fsquirt' without quotes

3.Now just select what you want to do ,transfer or download..

enjoy..
hope it works for you...

DOWNLOAD ANY VIDEO FROM 'YOUTUBE' SITE


Download Video From Youtube
 First you need to copy the url of the video you want to download.
  • Paste the url in the url bar at any of sites below:

HOW WE RECOVERY MEMORY CARD WHEN WRITE-PROTECTED

The Disk is write-protected” problem (Memory card)


  • go to Run
  • type regedit.
  • Navigate to the following registry key:HKEY_LOCAL_MACHINE\SYSTEM\CurrentControlSet\Control
  • Right click on control and create new key.
  • Name it as StorageDevicePolicies . (Copy and paste it from here if possible)
  • Now click on StorageDevicePolicies and in right side pan right click and select create new dword and name it as WriteProtect.
  • on it and set its value to 0.
Now restart your machine and try copying some files to your card

Tuesday, October 13, 2009

LATEST MICROSOFT OS WINDOWS 7 REVIEW


WINDOWS 7 OPERATING SYSTEM


Windows 7- next stable version on Windows operating system is going to be available. If you are using Windows XP and want to upgrade your operating system to Windows Vista, it is better to wait for some more time to upgrade directly to Windows 7. Many people are finding difficulties with Windows Vista. Vista is also the highly unstable version of Windows Series.
Windows 7 will use much less memory than Vista, it finally lets us arrange the taskbar and it will provide a multi – touch experience. The new interface looks far better than mac osx.

Minimum system requirements for Windows 7
• 800-megahertz (MHz) 32-bit (x86) processor or 800-MHz 64-bit (x64) processor
• 512 megabytes (MB) of system memory
• DirectX 9-class graphics card
• 32 MB of graphics memory
• 20-gigabyte (GB) hard disk that has 15 GB of free hard disk space
• Internal or external DVD drive
• Internet access capability
• Audio output capability
Watch the walk through presentation on the upcoming Windows 7 to provide insight and introduce new features and improved user experience in Windows 7


LOCK AND TRACE YOUR STOLEN MOBILE BY USING IMEI NUMBER


LOCK AND TRACE YOUR STOLEN MOBILE HAND SET 
BY USING IMEI NUMBER


       Do you know your mobile’s IMEI number? Just press * # 0 6 # in your mobile hand setIMEI number will be displayed in your mobile hand set.
Keep the IMEI number safely at other place. This IMEI number is unique number for each mobile hand setIn case your mobile hand set will get stolen, you can track or unlock your mobile hand set through IMEI number.
First track your mobile through IMIE number here www.trackimei.com and report theft or loss.
If your mobile hand set got stolen, you need to do following things.
1. Submit FIR for your mobile loss, give details of hand set model, color, IMEI number etc.
2. Ask your service provider to track the mobile phone, your mobile phone will be tracked only if the thief are using your mobile hand set with any sim card. If the thiefis keeping your mobile switched off, your service provider can not track the mobile hand set location. You should not expect muck cooperation from service provider or police to locate your phone.
3. If you are unable to find your mobile number, insure that at least your mobile handset is locked. The thief can not use (misuse) your mobile with any sim card. You should ask mobile service provider to lock your mobile through IMEI number.
If the thief is smart, he/she can unblock the mobile ( IMEI Unlock ) using the latest paid software as shown here.

TRACE WEBSITES WHICH YOU ARE USING


Trace websites


hen you type in the url and Hit Enter, what happens after that ?

Lets Trace and see what happens !

Do the following :
# Start >> Run 
or goto command prompt

# Type tracert www.google.com

---------------------- Note ------------------------
You can replace www.google.com with any website url.
----------------------------------------------------

Results :
$ First line shows the IP address of the website... $ You'll be shown steps in which the website gets load !
$ More is the number of steps more is time taken to load the website